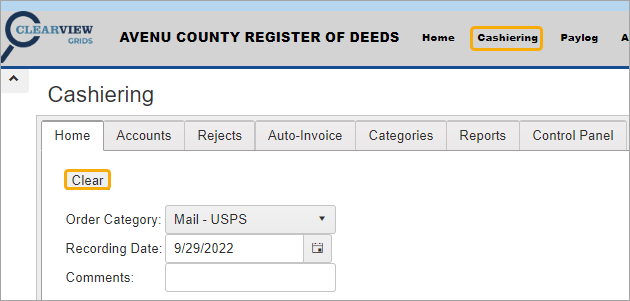
Creating a Non-Recording Order
For customers who come in and request a copy of a document such as a birth certificate, follow the instructions below.
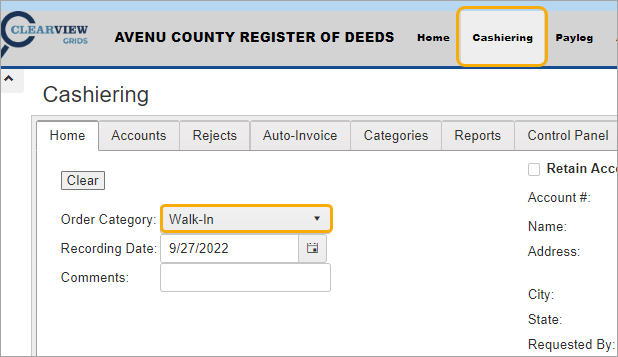
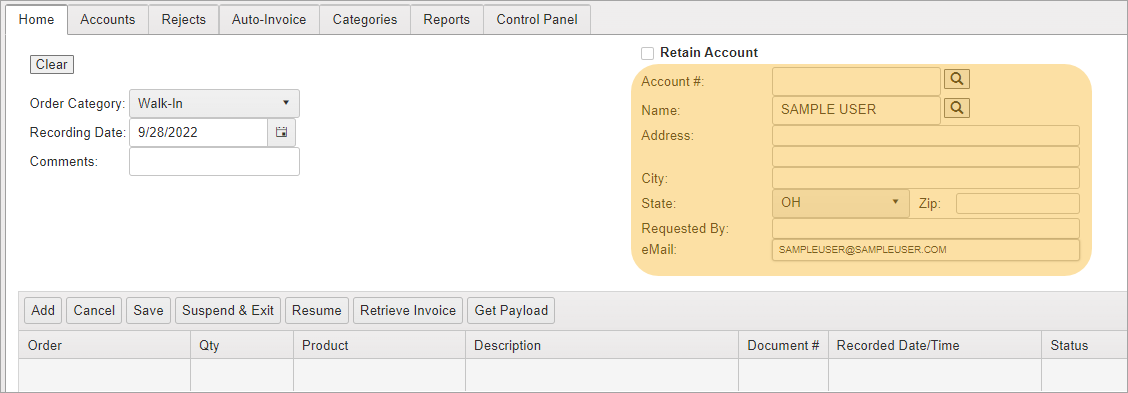
Navigate to the Cashiering Home tab.

Select an Order Category such as “Walk-In” from the dropdown.
-
Accept today’s Recording Date default or select a new one.
-
Enter any comments as necessary.
You do not need to enter any customer information or create a new account for non-recordable items. Walk-In order transactions are saved to “Account #0.”
However, if you do want to add a new customer to the system or search for a customer account, follow the steps below.
> Add a New Customer
-
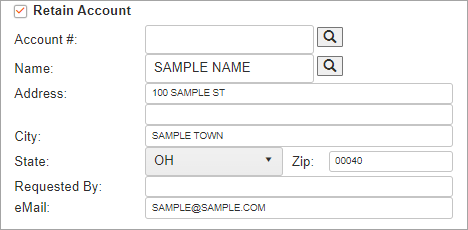
Check the Retain Account box.
-
Enter the customer information.
> Locate an Existing Customer Account
Locate existing customers by using the Account and Name search fields.
-
Enter the first few numbers or characters to bring up search options.
-
Click to select the customer.
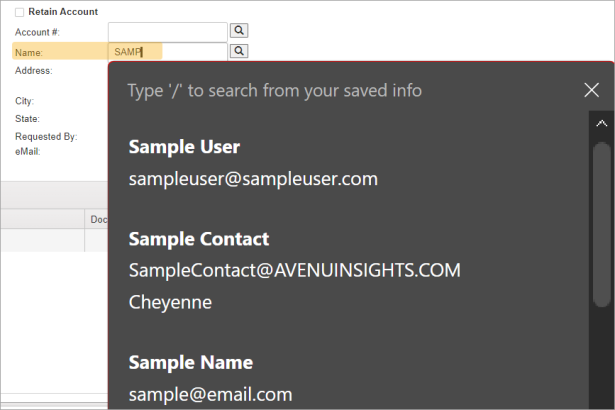
The customer information is automatically loaded.
For information on searching, see Searching for Existing Accounts.
-
Click the Add button in the grid.

NOTE: If you tab directly from the customer information section after entering the customer’s eMail, the Add button will become active. Then you can just press the Enter key or type ALT+A.
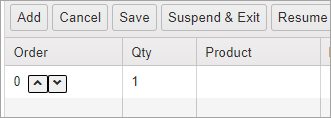
Clicking Add automatically sets the quantity to “1” in the Qty field.
-
Use the up/down carets to adjust the number of items in the order.

-
Press Tab. The Product field opens.

Add an Item to the Order
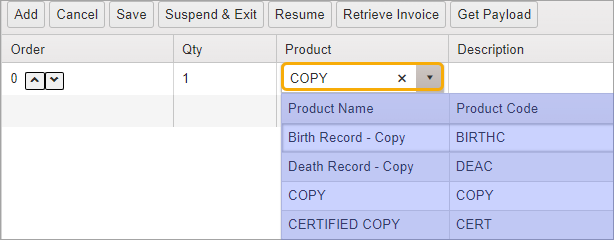
Select a Product using one of the following methods:
-
Enter the product name
-
Type a few characters
-
Click the caret to choose from the dropdown
> Adjust Product Fees if Necessary
Once you select a Product type, the system calculates the Unit Price, Total Amount, and Total.

NOTE: Some Product types, such as Correct Fee, do not have any fees tied to them. To add a charge, enter the fee amount directly in Unit Price field.

Press Enter or Tab out of the field to add the update.
> Add Description
If you want to add a brief description, tab to the Description field and enter the information. For example, you could add the Instrument number.

Click Save.
Document # and Recorded Date/Time will remain empty until payment is processed.
Add Any Additional Items
-
Click Add if you want to add another item or additional fees such as Certificates, Postage, or Copies.
-
Select a Product type for the new item.
-
If it’s a recordable item, complete the Recording Page.
-
Any additional fees will be added to the Total Amount.
-
Adjust fees if necessary.
-
Add Description if desired.
Click Save to add the item to the order.

An Order number has been assigned along with the status of “In Progress.”

At this point, you can Delete the item, Suspend & Exit the order, or continue with processing the payment.
See Working with Order Items for more information.
After saving the order, the Process Payment button appears.
-
Click to cashier the order.

The Payment Page opens.
-
Enter the payment amount in the desired payment method field.
-
Click Post to complete the payment.
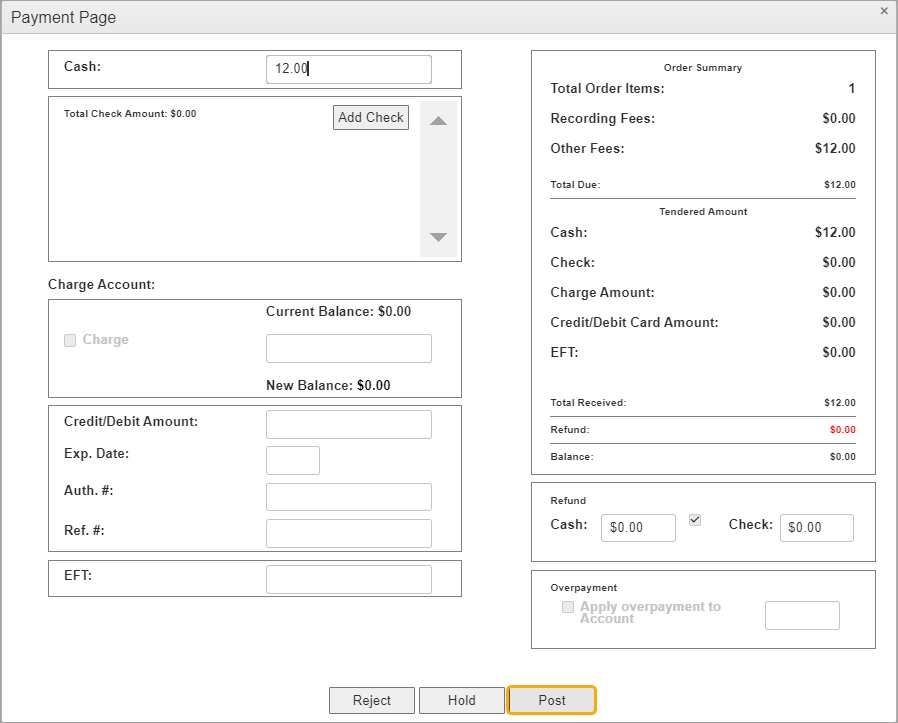
For more information on multiple payment types and other payment information, see Payment Page.
Once the transaction is posted, the button options at the bottom of the screen change to Print Receipt and Print Options.

For more information on printing receipts, labels, stamps, and endorsing checks, see Printing Features.
When the order has been paid and the Print Options and Payment Pages are closed, you will be returned to the Cashiering screen which displays the updated information.
Each item within the order now shows the Status as “Completed” in the grid row.
The order has received:
-
Receipt #
-
Order #
-
Order Date and Time
-
Status of “Completed”

If Book and Page Numbers are used, they will also be assigned.
Documents can be scanned immediately after being recorded. You can also scan them later using the GRIDS Scanning application.
For more information, see Scanning.
- Click Cashiering on the menu or the Clear button on the Home tab to clear the screen and start a new order.
